|
|||||||
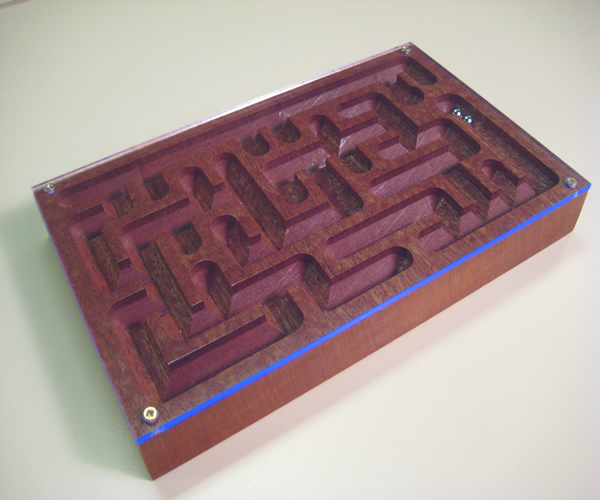
Above is the final maze with the improved route and Perspex top. The first maze (Below) was made before the sticky nature of the V cut grooves was understood and the top was vacuum formed onto the finished maze with a view to it auto sealing the project. Unfortunately not wanting to over soften the plastic so that it deformed into the maze paths meant that it didn't entirely form well round the sides either. However the head did weld it to the varnish and the two are now inseparable.
|
|||||||
Many Maze projects have been done over the years in schools and the fundamental thinking and design messages that it teaches are undeniable. The design process can be followed and then repeated as improvements tot he maze are suggested. I have seen CNC machines used for maze projects but often acrylic, a material that does not lend itself well to high speed machining, any heat generated in the cutter will quickly cause a blockage of the flutes with the result that the whole process can very quickly become a disaster. On a milling machine i once saw a very clever swarf removal system the teacher has placed a piece of electrical tape around the cutter with the ends stuck together like a flag and at the low speeds of the milling head the swarf was easily swiped clear of the job. However of we are to accept the pressures of the new "Larger" class sizes speed does become a factor in the projects success. Wood is a far greener material than plastic and softwoods are far more being seen as a renewable source. Again in the hands of a CNC router shaped cutters can be used to make far more that just their linear edging shapes. The chamfer tool with its vertical cutting blades means that it can also do quite deep trenching work this lends itself to making paths in a maze, the groove also adds a level of style that a flat bottom looses. The V shaped tracks make the junctions very jumpy and the ball sticks, this would make a well designed maze where the path is made of mostly T junctions very hard as the ball accelerates and shoots past the entrance you are trying for and a well designed maze would be extremely frustrating. A lid / container was also made using the vacuum forming machine to hold the ball in place, the jumpy nature of the track was so effective at some points that the ball launched itself out of the maze.
|
|||||||
|