|
|||||||
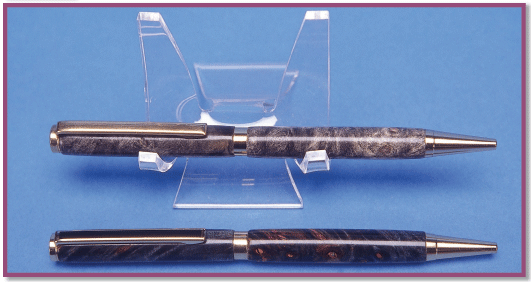
Firstly you will need some pen kits. There are many styles of pen kit on the market, if this is your first venture into pen making I would recommend you start with some slimline kits. These kits are the most prevalent and the easiest to manufacture.
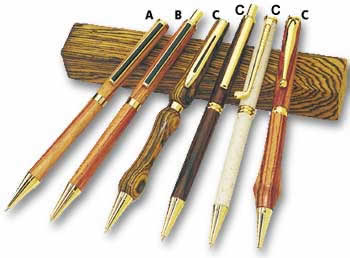
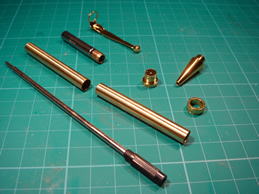
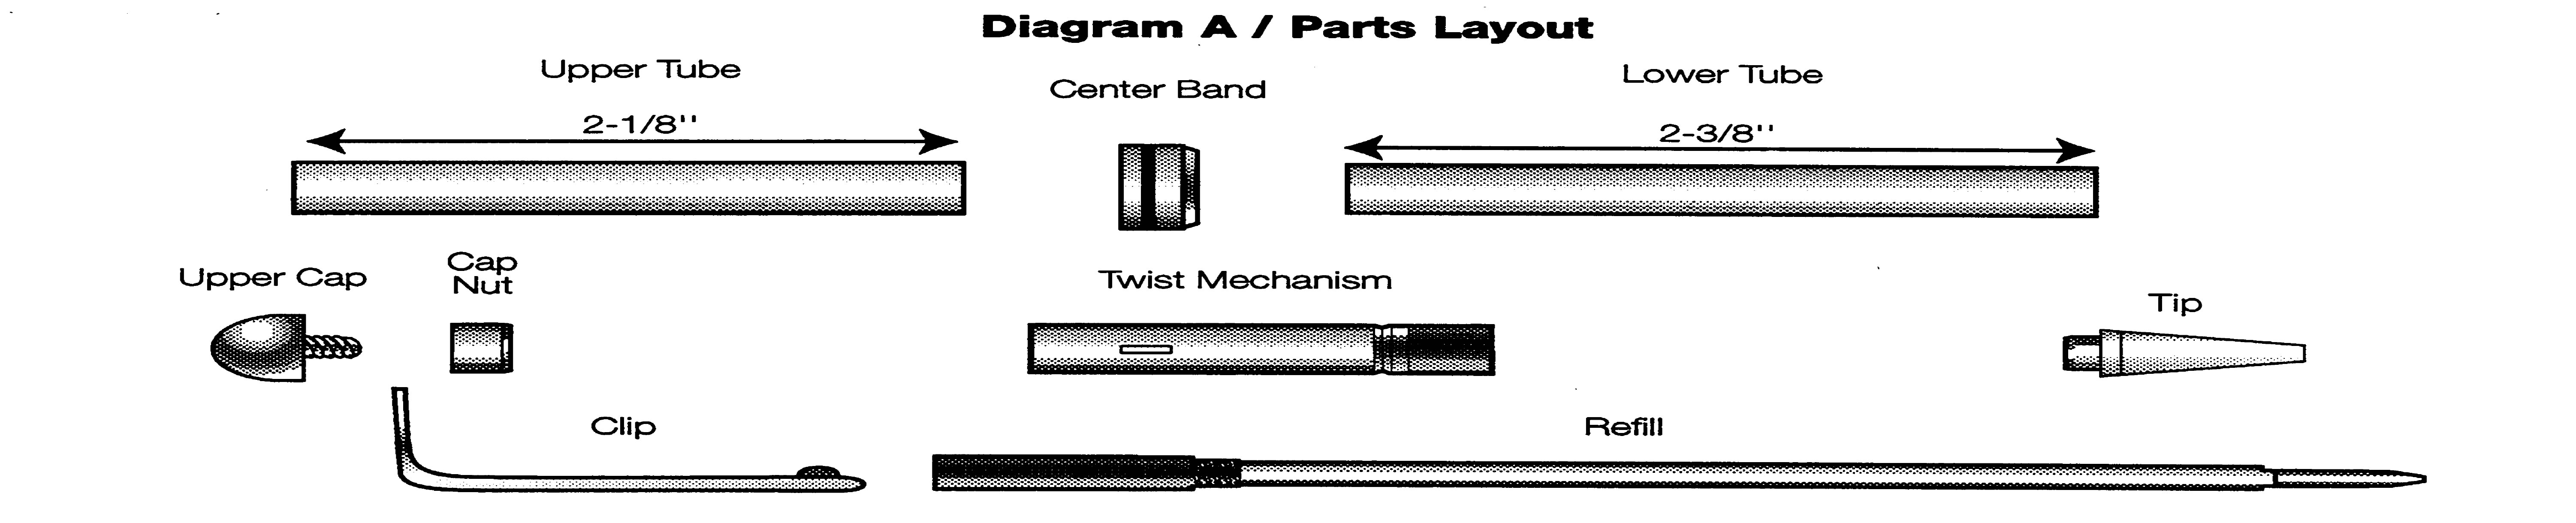
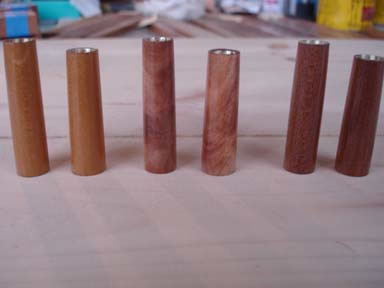
This picture gives you an idea of the slimline range. You will also need some pen blanks.
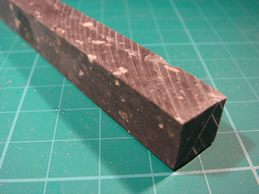
Plastic Composite
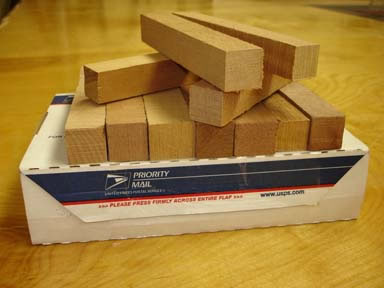
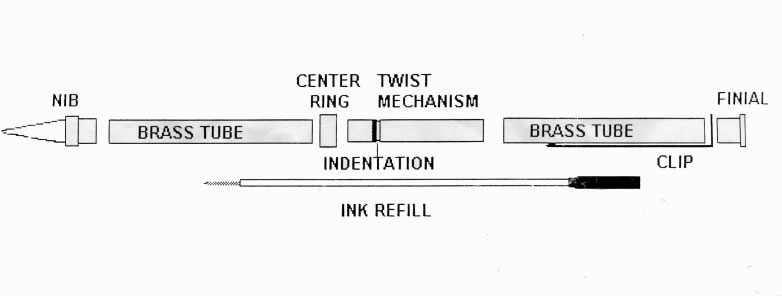
Wood Blanks To explain :- The pen kit will include all the metal pieces and mechanics including an ink cartridge to complete your pen; The breakdown will be: Two brass sleeves these will form the inner core to your machined pieces. One hollow tip, a cap that finishes the top and holds the pocket clip, a twist mechanism and a pen refill.
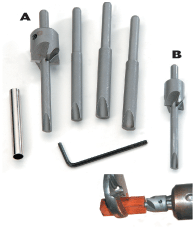
If it sounds complicated please don't be put off the actual assembly is very straight forward. You will also need a drill kit. At the time of writing these were about £10.
However this can be bypassed with a 7mm drill and a 1/4 inch drill. The kit does have a very useful flat drill (A & B in the picture) that machines the ends of the pens to give a flat end and good fit. But thus can be substituted for an old fashioned wood spade bit should your budget be limited.
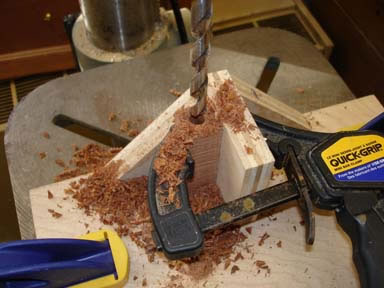
The Manufacturing Procedure :- The pen blank needs to be cut to approximately 2 to 3mm longer than the brass tube. Ensure that your kit has tubes of equal length, most slimline kits are supplied with two 50mm tubes. Once the blank is cut into two lengths it is necessary to drill through their length with the 7mm drill. Care will be needed when clamping these pieces in the vice as the hole needs to be as near the middle as possible, if there is to be sufficient material all round the pen to allow safe machining.
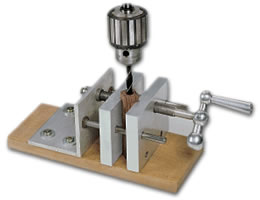
Drill Guide (Requires Clamping)
Drill Vice (By Far the Safest Method to drill the blanks)
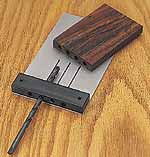
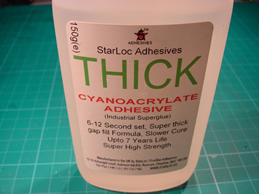
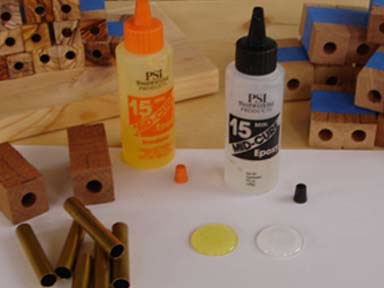
Optional Home Made Jig, When drilling the blank ensure that you remove the drill a number of times to clear swarf and be particularly gentle when breaking out of the far side, if you chip the ends there may not be enough material to make a neat pen. Once the drilling is complete using thick cryanoacrylate or epoxy resin, glue the brass tube inside the two blanks this insert will control the length and also add strength to the pen.
SuperGlue
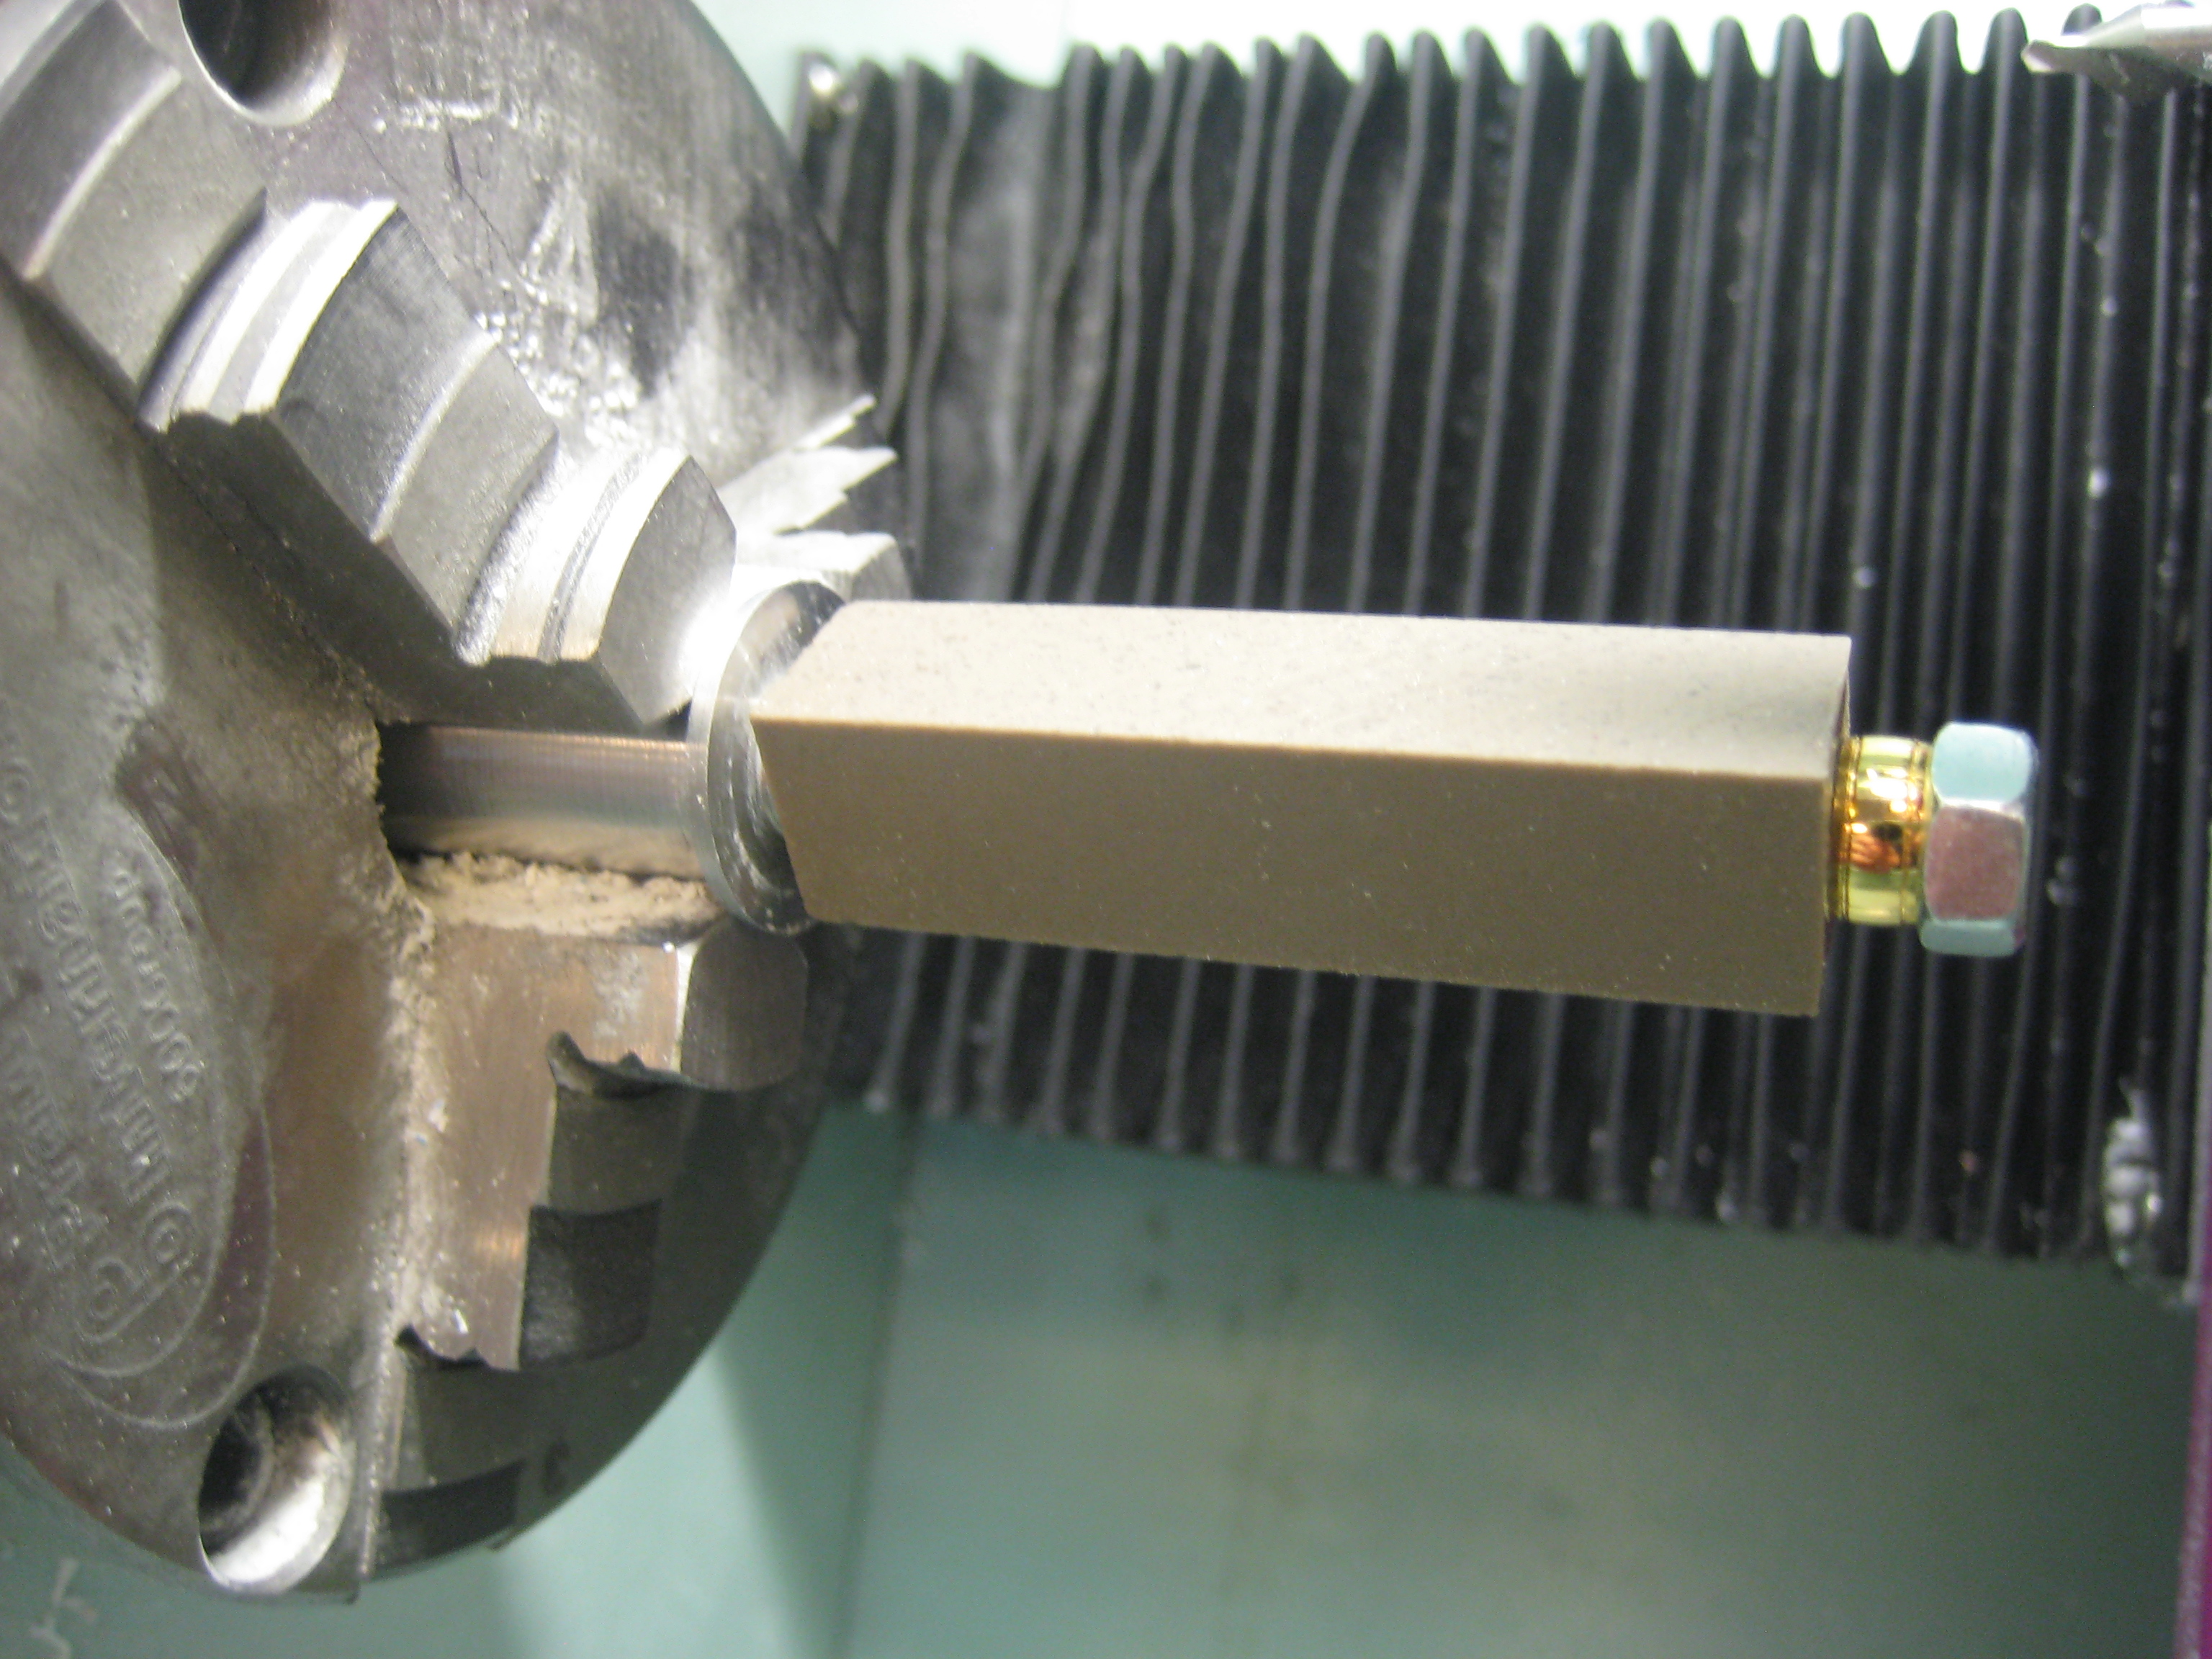
Epoxy Resin Once the glue is set we can then move on the the CNC lathe. To hold the blanks we can use a number of designs of mandrel. The first option is manufactured by the lathe using the following drawings. It is manufactured in two stages the first cuts the thread on the end, this is don't to stop the lathe trying to thread a piece of metal that is protruding too far from the lathe. Lathe Mandrel First machine - Download. Lathe Mandrel Second Machine - Download This mandrel will only work with slimline blanks of 50mm. Alternatively a piece of 1/4inch steel can be threaded at one and and then gripped in the 3 jaw chuck. The blank is then placed on either mandrel and gripped by tightening the nut on the threaded end.
A small spacer is also used to allow machining down to the minimum size which is about 9mm depending on the pen size. You will agree that the amount of material left after machining with an outside diameter of 9mm and the brass tube being at 7mm is very thin. This is only at the ends where the interface between blank and metal occurs. The big advantage of machining on a CNC is the beautiful sweeping curves that you can use on the pen's body. Once machined polishing with 500 and 1000 wet and dry paper will bring the luster up to a glass shine.
After body pieces are polished they can be trimmed to the length of the brass tubes using the flat end cutter and assembled. Assembly will require the use of a small press. If you don't have one the equipment section has a set of plans to make one in plywood. LINK I have found that the best assembly sequence is as follows:- Take the bottom half and gently insert the nib brass into the end of the tube. try to ensure that everything is in line, if you press the metal parts in at an angle they may deform the brass tube and crack your machined section. Once you are happy slowly force the end into the pen until it is butted up against the pen half. Take the screw mechanism and insert it into the base half up to the indentation marked. Don't insert too far as or the ink refill will not retract all the way into the nib. It is often best to stop short try the ink refill in the pen if it needs pushing in further remove the refill and then press a little further into the pen as required.
Take the clip and fit the cap or finail into it then press this into the top half of the pen. Finally push the centre ring over the protruding mechanism and push the two halfs of the pen together. Hey Presto one finished pen.
Pen blanks can be made from any number of materials I have an idea for an acrylic press that takes all the tiny scrap acrylic bits that come from other projects and inside an oven heatwelds the scrap back together to be cut up into pen blanks. If any school would like to help me with a box of scrap acrylic bits (To ensure it would work in the field). I will make a point of developing this project.
|
|||||||